Rotato Logo
    Rotato.gg
    BlogTorchlightROTMGMegaBonkBL Rivals

    MegaBonk Items

    A visual index of items. Figure out what the best & worst items are. Get good.

    Updated

    This is our MegaBonk items tier list — the best MegaBonk items ranked from S to D. If you searched for a MegaBonk item tier list, you’re in the right place.

    S-Tier Items

    S
    Overpowered Lamp item icon

    Overpowered Lamp

    S

    Multiplies on-hit effects (poison, bleed, execute). Core of every meta build.
    How this works?
    On-hit effects normally roll once. Lamp multiplies the number of rolls — e.g. 1 Moldy = 40% → 1 Lamp = 40% twice → 2 Lamps = 40% thrice. Capped at 2 because it is extremely strong for on-hit builds.
    Holy Book item icon

    Holy Book

    S▲▲

    Amazing in the current meta. This item can proc many other items, creating very good synergies.
    Joe’s Dagger item icon

    Joe’s Dagger

    S

    Infinite-scaling execute chance. Stacks damage insanely fast. OP
    Big Bonk item icon

    Big Bonk

    S

    2% chance to hit for 20× damage. Melts bosses.

    Sucky Magnet item icon

    Sucky Magnet

    S

    Auto-collects XP; great with XP Tome and Echo Shard.
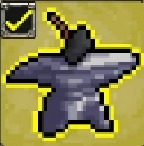
    Anvil item icon

    Anvil

    S

    Core late-game scaling item. Early Anvil is huge.
    How this works?
    Adds more possible stat upgrades per weapon level-up. If the weapon lacks enough upgradeable stats (like Aura), it will not benefit.
    Soul Harvester item icon

    Soul Harvester

    S

    Early-game carry with ghost projectiles. OP OP

    Green Card (Credit Card) item icon

    Green Card (Credit Card)

    S

    More chests = more luck. This is so good, because it means you dont need to use luck-tome.

    Echo Shard item icon

    Echo Shard

    S

    XP powerhouse.

    Unstable Transfusion item icon

    Unstable Transfusion

    S

    Adds bonus “back bar” damage -> massive.

    Idle Juice item icon

    Idle Juice

    S▲▲

    This is essential for pushing leaderboard. Not as useful for casual non-overtime play.

    Golden Shield item icon

    Golden Shield

    S▲▲

    Kevin-combo only. Banish unless playing for that.

    Kevin item icon

    Kevin

    S

    With golden shield only. (ensure enough lifesteal)
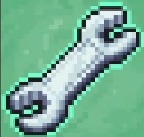
    How this works?
    Kevin self-damages, which triggers “on taking damage” effects (e.g., Gold Shield, Cactus, Toxic Barrel). To survive, build lifesteal or crit synergy. Fun combos: Corrupted Sword + Gamer Goggles, Golden Shields + Robinette, Toxic Barrel stacks, or Cactus + Thorns + Quinn’s Mask loops.
    Wrench item icon

    Wrench

    S

    Better and faster shrines; recycle to chase these or keys.
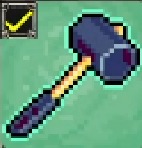
    Boss Buster item icon

    Boss Buster

    S

    Helps massively with elites and bosses.
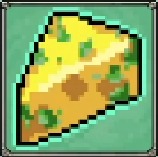
    Moldy Cheese item icon

    Moldy Cheese

    S

    40% poison chance; top-tier DoT.

    A-Tier Items

    A
    Spicy Meatball item icon

    Spicy Meatball

    A

    Very decent damage.

    Bloody Cleaver item icon

    Bloody Cleaver

    A

    Life steal + Bloodmark synergy for some extreme boss damage.
    How this works?
    Bloodmark stacks damage and explodes when it exceeds enemy HP or after ~10s. Scales off character level. Pair with lifesteal and attack speed to delete bosses quickly.
    Chunk Plate item icon

    Chunk Plate

    A

    Overheal + lifesteal for massive survivability.
    Dragon Fire item icon

    Dragon Fire

    A

    Underperforms in most builds, excellent in others.

    Power Gloves item icon

    Power Gloves

    A

    AoE scaling.

    Lightning Orb item icon

    Lightning Orb

    A

    Reliable AoE damage.

    Ice Cube item icon

    Ice Cube

    A

    AoE freeze potential.

    Cursed Grabbies item icon

    Cursed Grabbies

    A

    Amazing damage for hp trade-off. My favorite item.
    Grandma’s Secret Tonic item icon

    Grandma’s Secret Tonic

    A

    As long as you have crit, the damage is amazing.
    Demonic Soul item icon

    Demonic Soul

    A

    Nice to have damage scaling

    Beefy Ring item icon

    Beefy Ring

    A

    Reliable damage scaling.

    Bob item icon

    Bob

    A

    Never a bad choice; smooths weak starts.

    Toxic Barrel item icon

    Toxic Barrel

    A

    Great damage when you need early-mid power.

    Slurp Gloves item icon

    Slurp Gloves

    A

    Heals you nearly to full every ~9 seconds.

    Beacon item icon

    Beacon

    A

    Great for giga runs.

    Moldy Gloves item icon

    Moldy Gloves

    A

    Potentially strong on-hit synergy.

    Turbo Socks item icon

    Turbo Socks

    A

    Zoom.

    Cursed Doll item icon

    Cursed Doll

    A

    Pairs well with Cheese for double DoT pressure. Might be S-tier.
    How this works?
    Applies a “curse” to 2 random enemies roughly every second, dealing 30% of their HP. It does not stack on the same target, bosses take reduced damage, and it can still trigger on-hit effects.
    Key item icon

    Key

    A

    Free chest chance — saves gold and accelerates scaling. Goes GIGA with credit cards.
    Time Bracelet item icon

    Time Bracelet

    A

    XP acceleration.

    B-Tier Items

    B
    Speedy Boy item icon

    Speedy Boy

    B▼▼

    Slows time under 50% HP — clutch panic saver.

    Scarf item icon

    Scarf

    B

    Very good for casual players.

    Mirror item icon

    Mirror

    B

    Adds minor defensive layers.

    Spiky Shield item icon

    Spiky Shield

    B

    Adds minor defensive layers.

    Gas Mask item icon

    Gas Mask

    B

    Survivability if you build into it.

    Demonic Blood item icon

    Demonic Blood

    B

    Survivability.

    How this works?
    Bloodmark stacks damage and explodes when it exceeds enemy HP or after ~10s. Scales off character level (not weapon stats). Tip: lower base weapon damage, stack attack speed, lifesteal, and Bloodmark% for absurd boss damage.
    Electric Plug item icon

    Electric Plug

    B

    Strong early damage.

    Coward’s Cloak item icon

    Coward’s Cloak

    B

    Good to have one.

    Golden Glove item icon

    Golden Glove

    B▲▲

    A nice thing to have. Goes up a tier with +gold%
    Battery item icon

    Battery

    B

    Great attack speed boost in the current meta.

    Clover item icon

    Clover

    B

    Luck is never bad.

    C-Tier Items

    C
    Za Warudo item icon

    Za Warudo

    C

    Made for limit-testing. Great when pushing overtime near boss portal.
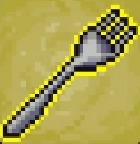
    Giant Fork item icon

    Giant Fork

    C

    Combo potential, but underwhelming alone.
    Energy Core item icon

    Energy Core

    C

    Decent early-game.

    Shattered Knowledge item icon

    Shattered Knowledge

    C

    Meh.

    Sl*tty Cannon item icon

    Sl*tty Cannon

    C

    Not bad, but there are better choices

    Backpack item icon

    Backpack

    C

    Okay pickup. +1 projectile is easy to get elsewhere.
    Demonic Blade item icon

    Demonic Blade

    C

    Goes up a tier when built for it.

    Leeching Crystal item icon

    Leeching Crystal

    C

    Feels pretty nice to have, better blue options exist though.
    Forbidden Juice item icon

    Forbidden Juice

    C

    Solid pick in many runs.

    Gym Sauce item icon

    Gym Sauce

    C

    Always okay.

    D-Tier Items

    D
    Gamer Goggles item icon

    Gamer Goggles

    D

    Good with certain combos

    Turbo Skates item icon

    Turbo Skates

    D

    No bueno.

    Campfire item icon

    Campfire

    D

    Fake healing; noob trap.

    Phantom Shroud item icon

    Phantom Shroud

    D

    Banishable, but its not a bad item.

    Golden Sneakers item icon

    Golden Sneakers

    D

    Waste of a slot.

    Skuleg item icon

    Skuleg

    D

    Only for gamers.

    Tactical Glasses item icon

    Tactical Glasses

    D

    Sounds better than it is.

    Meme-Tier Items

    Meme
    Quinn’s Mask item icon

    Quinn’s Mask

    Meme

    Meme.

    Eagle Claw item icon

    Eagle Claw

    Meme

    Meme.

    Cactus item icon

    Cactus

    Meme

    Somebody make this work.

    More MegaBonk Tier Lists & Guides

    Explore related resources to round out your build planning and patch knowledge.

    MegaBonk Items

    Browse every item with images, quick notes, and links to deeper guides.

    megabonk itemsmegabonk best itemsbest megabonk itemsmegabonk item tier listmegabonk tier list itemsmegabonk tier listbest items megabonkoverpowered lampjoes daggerjoe dagger megabonkbloody cleaveranvil megabonkmegabonk banish listmegabonk item synergies

    Picking Items for Overtime and Boss Pressure

    If you plan to push overtime, prioritize XP engines (Echo Shard, Time Bracelet) + Anvil, and dmg scaling like Idle Juice. For boss damage, ensure you have on-hit such as moldy cheese, and cursed doll. Then having bloodmark from Unstable Transfusion makes life easy-mode.

    On-hit stacking builds revolve around Overpowered Lamp. Multiplying effect rolls makes poison, dot, execute, and other procs scale explosively. Pair with survivability (lifesteal, overheal, potentially aegis) so you can safely ramp without getting popped from the ghosts.

    MegaBonk Items FAQ

    What are the best items in MegaBonk right now?
    S-tier items like Overpowered Lamp, Soul Harvester, and Idle Juice define the meta. Early tools such as Echo Shard and Anvil really accelerate runs, while the kevin+golden shield combo makes you OP.
    Which items should I banish or avoid?
    D-tier options like Golden Sneakers and Turbo Skates are low-impact in most runs. Campfire can be a trap; consider banishing these to improve rerolls.
    How do tier changes work between patches?
    Items on this page can have up or down arrows indicating movement from the previous patch. One arrow means a 1-tier change; two arrows means a 2-tier change. I will update this every patch, and do my best to deliver the most relevant info. There may be times where previous patch placements are still in place.
    Can I recommend a change to this tier list?
    Of course! I would love to hear your takes, suggestions, or feedback. Use the feedback form to reach me directly.